A presigned URL is a URL that you can provide to your users to grant temporary access to a specific S3 object.
Using the URL, a user can either READ the object or WRITE an Object (or update an existing object).
Uploading via Pre-signed POST is a two step process. The client first requests a permission to upload the file. The backend receives the request, generates the pre-signed URL and returns the response along with other fields. The client can then upload the file to the URL received in the response.
Let’s dig into how this works in more detail.
Step 1 : AWS Account Configurations
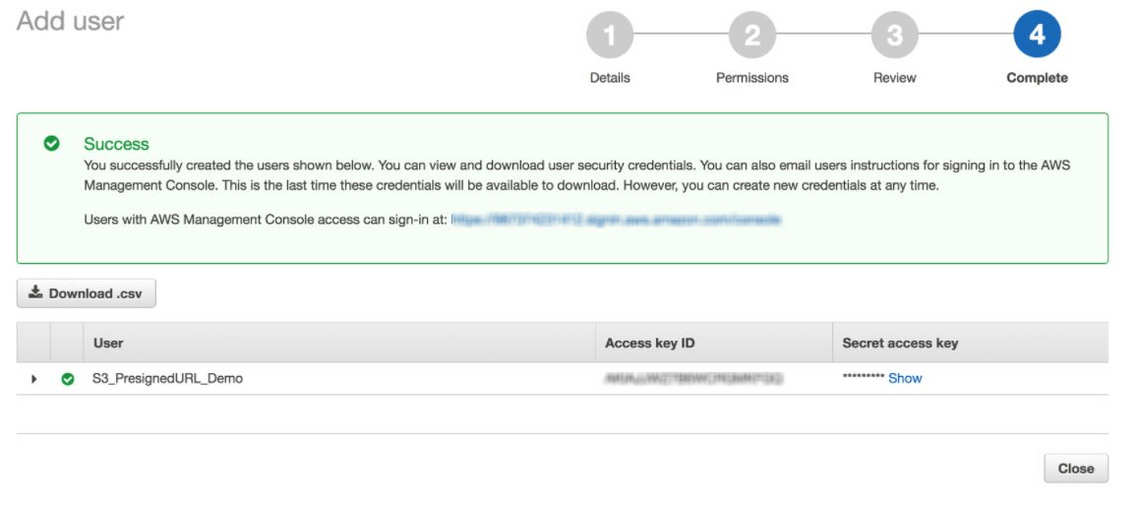
The first thing we need to do is create a IAM user which has access to both reading and writing objects to S3. An API key will then be created for the IAM user, which will be stored as an environment variable in the server.
Then follow the steps below for further configurations.
-
Navigate to S3 and create a bucket. The bucket name must be unique.
-
Navigate to IAM
-
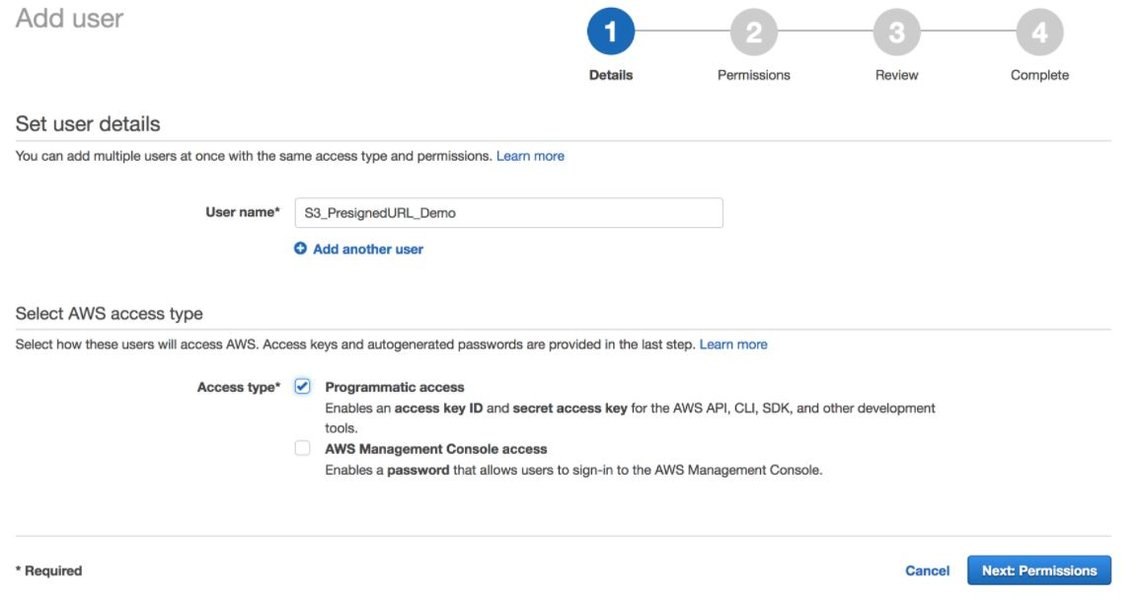
Create a User with Programmatic access
-
Click Next: Permissions
-
Click the Attach existing policies directly box and Create policy
-
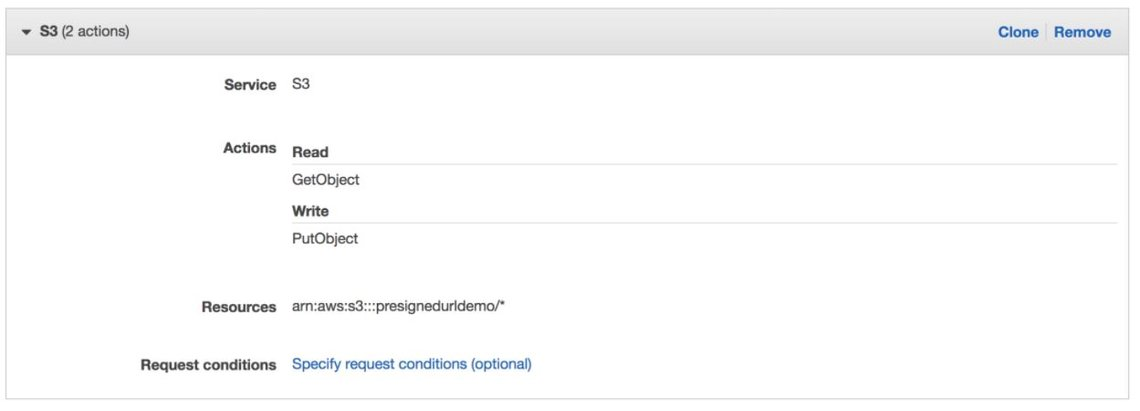
Use the visual editor to select the S3 Service. We only need a couple of access requirements; so expand out the access level groups
-
Ensure that GetObject under the READ section and PutObject under the write section are both ticked.
-
Set the resources you want to grant access to; specify the bucket name you created earlier and click Any for the object name.
-
We’re not specifying any Request conditions
-
Click Review Policy and enter a name for the policy. Save the policyNavigate to S3 and create a bucket. The bucket name must be unique.
- Apply the new policy to the new user you have created and take
Step 2 : Generating pre-signed URL on the api-server
On the server, we request a pre-signed URL from S3 via its aws-sdk.
Below shows a method for generating a PUT URL using the AWS S3 class.
### S3UploadHandler.ts
const { S3 } = require('aws-sdk');

const s3 = new S3({
  endpoint: endpoint,   	   ## Put your endpoint
  accessKeyId: accessKeyId,        ## Put your accessKeyId
  secretAccessKey: secretKey,      ## Put your accessKeyId
  Bucket: AwsS3Bucket,             ## Put your bucket name
  signatureVersion: 'v4',
  region: AwsRegion                ## Put you region
});

export const getSignedPutUrl: any = async (key: string, type: string) => {
  const params = {
    Bucket: staticAwsS3Bucket,     ## Put your bucket name
    Key: key,                      ## Put your file key
    Expires: time,                 ## Put expiration time
    ContentType: type,             ## Put file type
  };
  try {
    const url = await new Promise((resolve, reject) => {
      s3.getSignedUrl('putObject', params, (err:any, _url:string) => {
        console.log(err)
        if (err) return reject(err);
        return resolve(_url);
      });
    });
    return url;
  } catch (err) {
    throw err;
  }
};
An example usage of this function looks like:
const logoUrl = await getSignedPutUrl(key, type);
In this example, logoUrl will be a URL. We expose this URL to the client by returning it at an endpoint like '/users/get-file-upload-url'.
Step 3 : Client-App Configurations
When the user selects a file to upload, a POST request is sent to the api-server to get the pre-signed url.
Then fire off a PUT request to upload the file to S3 bucket using axios.
const upload = async () => {
    try {
        const metadata = {
          path: '/users/get-file-upload-url',   ## Put your api-endpoint
          method: 'POST',
        };
        const fileKey = `user-profile/${file}`; ## Put your file key
        const data = {
          key: fileKey,
          type: filetype,                       ## Put your file type
        };
        const { data: preSignedUrl } = await request(metadata, data, true);
        var options = {
          headers: {
            'Content-Type': filetype,
          },
        };
        await axios.put(preSignedUrl, file, options);
    } catch (error) {
      console.log(error);
    };
  };